11.18.2013

Coconut flour Herb Flatbread

herbbyy

The recipe pile

Do you ever feel like even if you try and try and try…the pile of  “things to do” will never get smaller. That my friends, is the definition of blogging. Don’t get me wrong. I love writing and sharing my knowledge and recipes, but once in a while I get overwhelmed.

Take my recipe pile for example. It actually used to be a real pile of coconut-oil stained post-it notes. Last month I roughly typed up the hard to read recipes and counted over 20 recipes! It was quite fulfilling seeing the recipes I spent so much time concocting last year in clean writing. I even has most of the pictures already taken too.

The hard part is juggling everything together (blogging, researching, recipe making, emails and social media…). I will tell you a little secret. I have about 186 unread comments that need to be read and responded to. I have about 300 emails that need to be read (you know the ones that actually are important and can’t just be deleted).

I can’t get caught up thinking “I will never be on top of things”…because honestly I don’t think I will. I have learned to accept that and just do what I can, when I can. I hope you understand.

Grain free & dairy free 

A few days ago I asked several of you on Facebook if you were dairy free. I got an overwhelming response that YES most of you are dairy free and prefer using coconut milk in cooked recipes. I made this recipe with both raw milk and coconut milk. I think my family preferred the recipe with coconut milk because it was lighter. You can certainly choose what you want to use, but I think the homemade coconut milk or this one (no additives) or this one (BPA-free) would taste great even if you are not dairy free.

A note on the coconut flour. I have found that my favorite brand is this one. Why? Because it is very fluffy and almost powdery (like real flour) instead of heavy like coconut flour is known to be. Also make sure to let the batter sit so the coconut flour can absorb all the liquid first. If you use a denser coconut flour like this one, be sure to sift the flour (you can use a sifter or a fine mesh sieve) so the recipe turns out the same.

This recipe is pretty simple and was inspired by my coconut flour pizza crust. You may think its exactly the same, but actually it is quite different with the herbs and olive oil added. I think it deserves its own recipe.

Flatbread

I know many of you can’t have cheese or nightshades so I did not want to specify that this “flatbread” was a pizza crust. I don’t like to limit your creativity with a recipe like this by putting the words “pizza crust” into the title. Half the time we make this, no pizza ingredients are in sight. Actually, this flatbread was first created because my sister could not eat nightshades on her elimination/GAPS diet. This herb flatbread was sliced up and used to be dipped into olive oil with a bit of sea salt added.  I don’t think we made enough because it was gone in 5 minutes.

Freezing

The second time we made this, I tripled the recipe and froze small flat breads to be warmed up after school or work. I stored them in these gallon sized plastic bags and layered unbleached parchment paper in-between the flatbread (you can fit a few in each bag if you do it this way). All you need to do then, is turn on the oven to 375 and bake until warm and crispy.

Bread substitute 

I think many of you former bread eaters will really like to have this SUPER easy recipe around for a “bread alternative”. Everyone knows that fresh bread tastes the best, right? I would consider this recipe easy and can me made in about 30 min (including cooking time).

Layer some leftover meat, homemade mayo, fresh veggies and you have yourself a sandwich! Feel free to use this as a crust for pizza (my recipe) if that is what you are craving too. This coconut flour herb flatbread is GAPS friendly too.

Enjoy getting creative.


INGREDIENTS:

1/2 cup Coconut Flour

3 eggs

1 cup coconut milk (homemade or buy here) or organic whole milk

1/2 tsp sea salt

1/2 tsp dried oregano

1/2 tsp dried basil

1/2 tsp garlic powder

drizzle of organic extra virgin olive oil

DIRECTIONS:

1. Preheat oven to 375 degrees.

DSC_0257

DSC_0251

DSC_0263

2. Mix together the coconut flour, sea salt, herbs, & garlic powder in a bowl.

DSC_0262

DSC_0264

DSC_0250

DSC_0266

DSC_0267

3. Whisk the eggs and coconut milk in a separate bowl.

DSC_0269

4. Pour the wet ingredients into the coconut flour mixture.

DSC_0270

DSC_0271

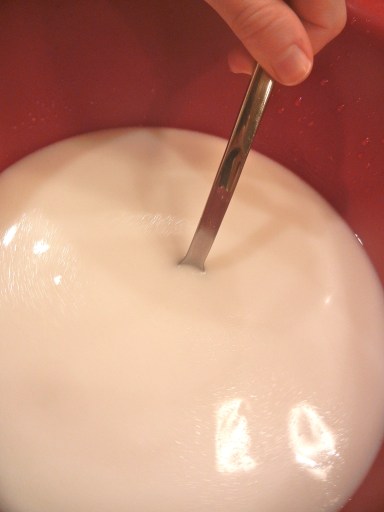
5. Stir until no clumps are left. Let the batter sit for at least 5 minutes (so the coconut flour absorbs all the liquid). It should resemble a thick paste like the picture above.

DSC_0273

Here is the unbleached parchment paper that I used (click here)

DSC_0280

6. Prepare your pan. I drizzle some olive oil on the bottom of pan (10 x 15 ” rimmed pan) and then place the parchment paper (oil first helps the corners stick). I also drizzled some olive oil on top of the paper and spread it out with a pastry brush. The olive oil is optional but it gives a nice flavor to the flatbread.

DSC_0281

7. Scrape all the batter out of the bowl onto the prepared pan. Spread it evenly across the whole cookie sheet with a spatula. You don’t want the batter too thick or else it may not cook all the way though.

*Another idea would be to create mini flatbreads but they would require less cooking time of course.

DSC_0282

DSC_0293

8. Place cookie sheet in the oven for about 25-30 min, depending on how crunchy you like the edges. Mine was golden brown on top and was just the right texture.

*This coconut flour flatbread gets softer with time, so if you like it a bit crispy, eat it soon after it comes out of the oven.

DSC_0294

9. To remove the parchment paper, just pinch the corner and pull it right out. Cut into slices or any size that you choose.

*Tip: let the crusts cool all the way to room temperate before freezing

ppeeppe4

~Stay Gutsy, Caroline

disclosure 3
08.03.2012

GAPS Coconut Milk Yogurt! (dairy free)

Yum Yum yum.

GAPS coconut milk yogurt is the answer to your dairy free yogurt dreams!

Here is a recipe I know a lot of you have been waiting for. Thanks for being so patient!

googo

The road to the perfect recipe…

I have been experimenting with coconut milk yogurt for quite some time. After trying recipe after recipe, I decided to just go with my gut, and do what I thought would be best. Coconut milk yogurt experimentation should not be taken lightly! I don’t know about you, but for me, gelatin is hard to  get the hang of. Its tricky to find the exact consistent you want and you won’t know until many hours after you add it into the yogurt. I know that on GAPS many of you still cannot have dairy, even though it is fermented. It can take many months to heal your gut so you can have dairy again. In the mean time, don’t deprive yourself of your favorite foods! If you were once like me and loved your big bowl of yogurt and fruit, then giving yogurt up was hard! This is where coconut milk yogurt soars into the rescue 🙂

My big coconut milk yogurt flop!

I tried all types of dairy free yogurt but they were all filled with wired gums and goos. I thought to myself..why not make my own?! Well the first few times it was a big flop. I didn’t know that coconut milk doesn’t thicken like regular yogurt, so mine turned out exactly like cultured liquid coconut milk. I tried putting it through a cheesecloth..and well I got like 1/2 cup worth. I then brought out the Unflavored Grass fed Gelatin, and voila, this recipe was born. *confession: I actually put too much gelatin in and I didn’t want to waste it so I used beaters to see if anything would happen…YEP it made the perfect yogurt! I hope you like it as much as my friends and family do 🙂 Your effort will be well worth it.

Is coconut milk good for you?

YES! Coconut milk is one of natures best foods for your body! Think about the old days where you would find a coconut in a tree and it could be a whole meal. No wonder why there are so many different coconut products!

Coconut milk is filled with…

  •  lauric acid which is a fatty acid that is found in mom milk.
  • It promotes brain development and healthy bone growth.
  • It is a super anti viral, anti fungus, anti microbial. That means it can kill off the bad guys that make you sick or give you candida.
  • Coconut milk helps to control you weight, because fat does not make you fat.
  • It is filled with minerals so your skin, hair and even attitude should be better.
  • You bones will benefit from the phosphorus and iron will pump into your blood…and I am just getting started 🙂
  • Better yet coconut milk is great for the immune system and it easy on the gut. So if you are sick or on GAPS, coconut milk is a good choice.

Ferment it!

Whats better than plain coconut milk you ask? Fermented coconut milk. When you make this yogurt you are adding cultures to it. Anything fermented is always easier to digest for your body. Adding the grass fed gelatin is just an extra bonus. Really, this is one of the perfect GAPS foods. I consider this a truly gutsy food 🙂

Recipe Update: I want to make an update on this recipe. Many people have expressed how this recipe is time consuming, which I would have to agree. I have found that you can completely skip the fresh young coconut part and just used canned coconut milk, gelatin, an a starter or probioitc powder. Steps 7-12 are optional. I find that the young coconut just adds more nutrients and minerals but it actually tastes almost the same. I hope this helps 🙂

INGREDIENTS:

* I list using both coconut milks in this recipe because I find that the canned stuff is creamier, but more expensive. So I mixed the two. Feel free to just use one if you would like.

4 cups homemade coconut milk

1 ½ cans / (20.25 oz) / 2.5 cups :  coconut milk (BPA free) or this brand (no additives)

1 pureed young coconut meat (optional)-  This doesn’t really change the texture much. I like to use the water for young coconut water kefir, so I always have left over meat. Adding the young coconut meat also helps feed the fermentation process.

pinch of sea salt

3 TBS organic sugar or raw honey

8 tsp Unflavored Gelatin (grass fed)

1 T vanilla (optional)

(Bacteria options): 1 packet of vegan yogurt starter, ½ cup premade coconut milk yogurt, open a few probitoic capsules or few scoops of this powder.

DIRECTIONS:

img_491413

1.  Make homemade coconut milk

DSCN2317

2.  Heat the 4 cups of homemade and the 1 ½ cans of canned coconut milk together in a stainless steel pot on the stove. Heat to 180 degrees. Use a candy thermometer.

DSCN2320

3. Take out 1 cup of the warm coconut milk, sprinkle the gelatin on the milk, and stir the gelatin until dissolved all the way. (This step is important so you don’t end up with gelatin clumps).

4. Add the 1 cup of dissolved gelatin/coconut milk back into the pot of warm coconut milk.

DSCN2321

5.  Add the sugar into the warm milk and stir until dissolved.

6. Let the milk cool down to 100 degrees. This takes a few hours, so I just left it on the stove to cool. Don’t put it in the fridge or ice bath because remember it has gelatin in it, and if you forget it, it will gelatinize.

DSCN2313

7. (optional step) While the coconut milk is cooling, crack open a young coconut. Learn how here!

DSCN2417

8. (optional step) Take 1 cup of the cooling coconut milk in the pot. (It doesn’t matter the temperature) and pour it into a blender.

DSCN2315

9. (optional step) Spoon your reserved young coconut meat from step 7. into the blender as well.

DSCN2319

10. (optional step) Blend away until smooth. It will be liquidly and easy to pour. DSCN2422
11. (optional step) Once the big pot of coconut milk is cooled down to 100 degrees, add the blended coconut meat minxture from step 10.

DSCN2408

12. (optional step) Stir.

DSCN2398

DSCN2399

13. Sprinkle over your culture starter (or premade coconut milk yogurt) into the coconut milk. I like to pour my coconut milk out of the pot and into a bowl with a spout.

DSCN2403

14. Stir

DSCN2411

DSCN2414

15. Pour coconut milk into 2 quart ball jars and screw on metal lids.

DSCN2416

16. Keep at a constant 110 degrees for 7-10 hours to ferment it. I put mine in my Excalibur dehydrator. But an oven would work too. You need the heat so the bacteria grows.

17. Check and taste after 7 hours to see if the sugar has been eaten up. It should not be as sweet anymore. If you want it sour, keep it going a few more hours.

DSCN2436

18. After it has been fermenting, you will see the liquid separated at the bottom. You will also see that it has not thickened. This is normal.

19. Refrigerate for 7-10 hours until firm.

DSCN2439

20. Take out of the fridge. The coconut milk should be solid like Jello. This is good!

DSCN2440

22. Spoon both coconut milk yogurts into a bowl.

DSCN2442

DSCN2443

DSCN2444

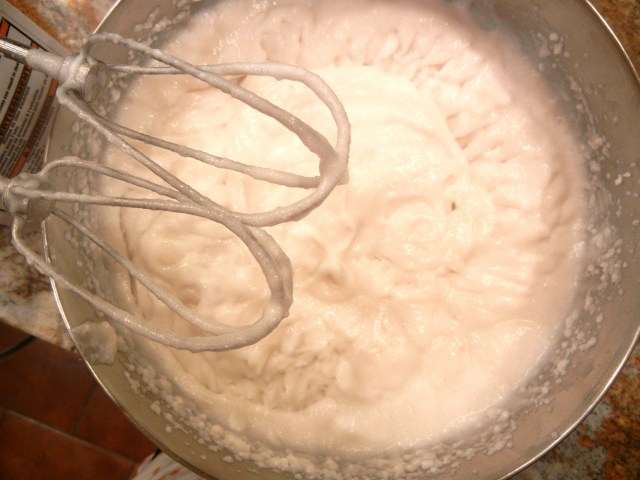
23. Beat the jello consistency coconut milk, until it is smooth and has no more clumps. This takes a few minutes. It will go through stages. Jello cubes, chunky, and then creamy.

DSCN2447

24. If yours creamy enough? If not keep beating..

24. Transfer the fluffy smooth coconut milk yogurt (should be a pudding texture) into a bowl (to eat) or back into the jars (to save for later)–> I like to use these single serving jars. It will be a little thicker once it has been refrigerated again for a few hours!

DSCN2466

25. Enjoy your yummy hard work!

Topping ideas:


cooonn

~Stay Gutsy, Caroline


disclosure 3