07.12.2012

Celery Root Bacon Hash Browns (GAPS)

YUM! GAPS friendly savory smoky hash browns for breakfast!

bbacon

Potato craving

There are a few things that my family misses most when on the GAPS diet. One of them is potatoes. Honestly, I have never liked potatoes, but that is probably because I am very allergic to them, and my body knows better. Before half of us started GAPS, my dad always used to make a big batch of skillet potatoes on the weekend and people would nibble on them right off the stove. By the time they were all done, there were hardly any left :).

Now when my family has potatoes, those of us on GAPS (who like potatoes) sometimes feel left out. Being on the GAPs diet should not leave you feeling like you are missing out. You are gaining so much from doing this diet! Someday you will be able to have potatoes again, but you need to heal your gut first!

“Hash brown”

So, to ease the potato craving, I decided to create a sort of substitute, using celery root (which is GAPS friendly). At my house, those hash browns are always good to have on hand for a quick meal for my brother, dad, or younger sister not on GAPS. I wanted to make something kind of like that for of us on GAPS.

Since potatoes are usually a breakfast thing at my house, I wanted to create something unique with breakfast flavors. That is when I thought of celery root bacon hash browns! Celery root makes a good stable alternative to potatoes. When you are shredding the celery root, the smell will be strong, but don’t let that stop you from making these. When celery root is cooked, the texture, taste and smell resemble potatoes. The bacon really adds a nice flavor that helps cover up the “vegetable” taste of the celery root.

I designed the recipe so the celery root hash browns can be kept in the freezer for an easy breakfast. I pre-cooked them and then froze them into squares. So, when breakfast or lunch comes around, all you have to do is pop one out and put it on the stove or a baking sheet until golden brown!

INGREDIENTS:

1 medium celery root

1/2 onion

1/2 tsp sea salt

1/2 lb bacon (4 big pieces)

4 TBS fat (lard, tallow, coconut oil, ghee)


DIRECTIONS:

IMG_5031

IMG_5034

1.Dice your bacon and add to the skillet.

IMG_5036

2. Dice your onion and add to the same skillet.

IMG_5041

I used leftover bacon fat.

IMG_5040

3. Add the 4 TBS of fat to the skillet and brown everything together.

IMG_5024

4. Wash the outside of your celery root.

IMG_5026

5. Cut the skin off of the celery root. *Save the skin for your chicken or vegetable stock!

IMG_5027

6. Quarter the celery root to fit into your Cuisinart (I use this one).

IMG_5030

7. Use your Cuisinart (thick shredder side) to shred the celery root. * You can also use a normal grater.

IMG_5043

8. Add the celery root to the skillet and cook down for a few minutes.

IMG_5045

9. Scoop the mixture out of the skillet and press down onto a baking sheet (I only used 1/2 of baking sheet. The flat sheet makes it easier to cut on than a baking pan).

IMG_5049

10. Freeze for about 1 hour until hardened and cut it into squares.

IMG_5051

11. Separate the squares with a knife or spatula.

IMG_5052

12. Store in a container or plastic bag layered with unbleached parchment paper.

13. Prepare:

Heat up a skillet. No extra fat needed!

Add your frozen hash brown and cook until golden brown.

or

Heat your oven to 400 degrees.

Place your hash browns on the baking sheet and cook for 15-20 minutes.

Screen Shot 2013-11-15 at 10.41.03 PM

This is what the “hash browns” look like when you take them out of the freezer. A nice perfect square!

DSCN2175

This what the hash browns look like when you cook them. They fall apart into a little pile of yummy breakfast goodness! This looks like a very little pile, but they are rich and nutrient dense!


14.Eat!

 bbe


~Stay GUTSY, Caroline


disclosure 3
07.12.2012

Frozen Avocado’s

Who likes Avocado?

I hope you all enjoyed my guest post at GNOWFGLINS. It is a story about me, and  how I learned to accept myself and the GAPS diet!

Now onto another GAPS recipe! Well, i guess this really isn’t a recipe. I would consider this GAPS prep work! There is a lot of preparation on the GAPS diet, as some of you may already know. My role is to help your transition be as smooth as possible, so your whole life doesn’t revolve around food (shopping, cooking, cleaning). Yes I LOVE to cook and go to my farmers market, but sometimes I don’t want to be cooking! If i am not creating recipes I usually am soaking up the sun and swimming in my lake 🙂

So, to save time, here is an easy step to help your GAPS life. What sparked me to do this was actually the GREAT price ( $0.70 a piece I live in Minnesota, so avocados don’t get much better priced than that!) I found on these avocados at my local grocery store. No they are not organic. I don’t bother to buy organic avocado’s because they have a shell that protects them.

Now you are probably wondering..can you really freeze avocados? The answer is Yes! I use the frozen smashed avocados for guacamole, blending into smoothies, making chocolate pudding, baked goods, and spooning into soups. You can pretty much use it any way you would a fresh, smashed avocado. I don’t think it changes the consistency much, but if you are worried use it when you incorporate it into a recipe.

So here you go. Easy pictures for you to follow exactly what I did.


INGREDIENTS:

Ripe avocados

1 TBS lemon juice for 3 avocado’s (this keeps it from turning brown. You cannot even taste the lemon when you put it into recipes)


DIRECTIONS:

1. Wash your avocado’s and take off the stickers and the little knobs (stems) at the top.

2. Slice open your avocado length-wise. Cut around the pit and twist the two halts apart.

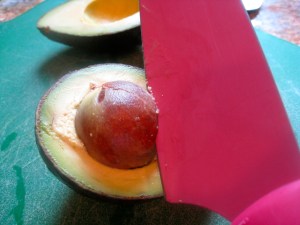
3. Carefully stab your pit with your knife…very carefully!


4. Twist out your pit with your knife. This is really easy if you have a ripe avocado.

5. Take a big spoon and soup around the edges of the skin to release the avocado flesh. Again, this should be easy if the  avocado is ripe. Otherwise you will have to really dig it out.

6. This is my shell after taking 1 big scoop of the flesh. I almost got the whole thing in 1 scoop 🙂 I love doing that!

7. Repeat steps 2-6 for all your avocado’s. I did about 20 of them 🙂

8. See the little brown spots? That is most likely going to happen, so just scoop the little bad spots out. You don’t have to get them perfect, just do the best you can.

9. Place the scooped avocado’s  in a big bowl.

10. SMOOSH! You can use a potato smasher, a fork, a Cuisinart, or your hands (That is what I did. But I cleaned them very well before).

11. Use lemon juice to keep your avocado’s from turning too brown. Discoloration is normal, but you want to reduce it as much as possible. 1 TBS for 3 avocados.

12. This is my little trick for putting things in plastic bags with NO mess. You might have your own way, but here is mine. Set up your cups and stick a plastic bag ( sandwich size) into the cup. Roll the top zippy part over the rim of the cup. (Honestly I really don’t like plastic, but I have not found a better way to freeze things yet. I break too many glass jars when I attempt to freeze things in them)

13. Spoon a few big scoops into the set up plastic bag. I don’ t like to fill them too much, because I usually want them to defrost quickly!

14. Without getting avocado mush on the edges, carefully flip the zippy part back over the cup. Take the bag out (don’t spill the avocados) and gently squeeze the air out and zip it up!

15. Repeat steps 13 and 14 until all your smashed avocado’s are in bags. I only set up 4 cups and just kept replacing the bags into them as  I went along.

16. Flatten your avocado bags to make them easy to store in your freezer.

17. Place the bags in your freezer. Try to place them on a flat surface, or better yet lay a cutting board in your freezer and lay the avocado bags on it for a nice flat freezing.

18. Now You have smashed avocado ready to use at your convenience! Frozen avocados taste really good in smoothies. The reason why we do this is because, we like to get food when it is in either in season or at a good price! Above, is my defrosted smashed avocado’s that I am using in a recipe which will share with you soon! I have a little brown coloring, but really it doesn’t matter!


~Stay Gutsy, Caroline


disclosure 3
07.08.2012

GAPS chocolate drops

Finally a GAPS chocolate chip. Though I like to call them chocolate drops 🙂

honey c

Remember in the GAPS chocolate vanilla cookies there were those yummy chocolate drops..and the were GAPS friendly? Well, hopefully I didn’t keep you waiting too long….but it was totally worth it! Honestly I usually just make recipes up and a lot of times I forget to write them down, so I have to remake them and write down the measurements. I am getting better at this, but I had to recreate this recipe for you. Don’t worry it turned out the same. Actually my sister says they are better than before!

GAPS chocolate drops!

I cannot eat chocolate yet, but my family can and I wanted to make sure we had GAPS friendly chocolate chips around so they would not have to “cheat” on store-bought dark chocolate that has sugar in it. (If you don’t know by now, even though I cannot eat everything I make, I love to cook GAPS/traditional food for my family. They are my testers and i am very thankful for their taste buds!)

Is your chocolate craving really magnesium?

This chocolate can also be used as a spread for whatever you want: banana’s, crepes, pancakes, or even stir a little in some coconut milk! When I made these GAPS chocolate drops I wanted to give the body what it is really asking for when you want chocolate. Your body is really craving magnesium! So why don’t you satisfy your chocolate cravings and your body cravings at the same time?

I don’t like the name magnesium chocolate, but you can sure call it that if you want to. I don’t have cocoa butter , but I always have coconut oil around, and I am sure many of you are also that way. I have to warn you these do melt fast, so when you put these in recipes stir them in at the last-minute or place directly on top of pancakes/cookies so they don’t melt and turn he batter brown! I will give you step by step interactions to make it an easy little task!

Have fun!


INGREDIENTS:

3 oz Baker’s Unsweetened Chocolate

2 tsp vanilla extract or 1 vanilla bean

1/8 tsp sea salt or 4 ml (4 full squirts) Mega-Mag Liquid

1/2 – 3/4 cup raw honey (depends on how sweet you like it –just taste test it!)

1/2 cup Raw Coconut Oil


DIRECTIONS:

1. Melt your chocolate in a double boiler (or make your own and put a heat proof bowl over boiling water)

2. Let your chocolate cool a little (you don’t want to kill the good raw enzymes of the coconut oil and honey!)


mmmm

3. Stir in your coconut oil, honey, vanilla, magnesium/salt

DSC_0132

4. Your mixture will be very liquidy. You want the constancy just right. It needs to resemble peanut butter/Nutella. Either put it in the fridge for 1-3 hours (keep checking it because you don’t want it to turn solid!) Or you could leave it in a dark cool cabinet for many hours until it solidifies a little. (This is what I do because I like to forget about it and do something while I am waiting)

5. To Prepare your cookie sheet, line it with Unbleached Parchment Paper. Freeze your cookie sheet to keep it cold (this helps hold the shape of the chocolate point)

DSC_0113

6. Once your chocolate mix resembles Nutella/peanut butter constancy, spoon it into a plastic bag ( I roll my plastic bag over a cup to make it easier to spoon into). See how the chocolate consistent changed from step 4 to step 6?


DSC_0114


DSC_0115

7. Cut off a very little corner off the tip of the plastic bag and pipe little chocolate chips. Since the consistency is stable you will be able to create the little point at the top! If it is too liquidy then they will end up like flat drops (The picture below was my first batch–I was a little impatient and did not let it set enough so they are flat–woops!) You have to work quickly or pipe small batches at once so they don’t melt on the tray too!

8. Return the cookie sheet to the freezer until hard (this is a very short time)

DSC_0104-1024x680

9. Scrape off the chocolate chips into a container and put directly in the freezer.

10. Repeat until chocolate mix is gone!

12. Store the GAPS chocolate drops in the freezer until you use them.

DSC_0090

DSC_0089


13. ENJOY!

savew

~Stay Gutsy, Caroline Lunger


disclosure 3
07.07.2012

GAPS lemon bars

Hot Hot Hot!

Today it reached 102 degrees today! Have you ever heard of weather like that in Minnesota? After swimming all day on the lake, my sister and her friend wanted something sweet but light. Lemon bars sounded perfect to them!

You see.. my little sister and her friend love to bake, but they love to bake with white sugar and white flour. We eat mostly GAPS food around here at my house, so that was not an option for the whole family. They were a little skeptical, but to their surprise these turned out great! They taste just like the unhealthy lemon bars full of sugar. Heres a little secret…they are actually quite healthy! These luscious lemon bars are filled with grass fed butter, raw honey, organic lemons, and lots of love 🙂 These are a must have treat on the GAPS diet. Enjoy!


lemon

INGREDIENTS:

Crust:

*Due to high requests for a “nut free crust” I have decided to add this crust as a substitute. Please don’t use the garlic powder. Instead add in 2 Tbsp of honey*

1 1/2 cup Blanched Almond Meal Flour

1/2 tsp Celtic Sea Salt®

1-2 Tbsp organic honey or vanilla honey

2 TBS room temp butter or ghee <– coconut oil would work too

1 TBP Vanilla Extract (optional)


Lemon Filling:

1/2 cup Organic Lemon Juice

3 eggs

1/4 cup organic honey

1/4 cup melted butter or ghee <– coconut oil would work too


DIRECTIONS:

1. Heat oven to 350 degrees

2. Grease a 9×9 in baking dish with butter or oil <– I use this glass one.

3. Dust the baking dish with almond flour or coconut flour.

4. (dry) Mix almond flour and salt

5. (dry) Add in butter, vanilla, and honey

6. (dry) Mix these ingredients until you form a nice ball

7. Press your ball of almond dough into the bottom of your prepared pan

8. Bake for 10-15 min until golden brown on top

9. While the crust is baking mix all the lemon filling ingredients in a bowl

10. (wet) Mix the filling ingredients with a whisk or in a blender

11. Take out the almond crust and pour the lemon filling over it

12. Return the baking dish to the oven for 15-20 minutes until edges and top is slightly golden brown (you don’t want your crust to burn, watch it carefully!)

13. Take out the lemon bars and let cool on the counter for 30 min. If you cannot wait another moment you can eat them now (like we did) or put them in the fridge for 2 hours until set (this will make them easier to cut)

14. Eat and savor!

how


~Stay gutsy, Caroline


disclosure 3
07.06.2012

New look!


Hello! I am so happy to announce that Gutsy is now www.mygutsy.com!! Also the look has completely changed. I like it a lot because it is much cleaner and I can customize it even more. I want to take this new makeover as a chance to really start consistently blogging. I want to blog a few times a week, because every day is not possible when I have to make and experiment as well. I think I will do some videos too!

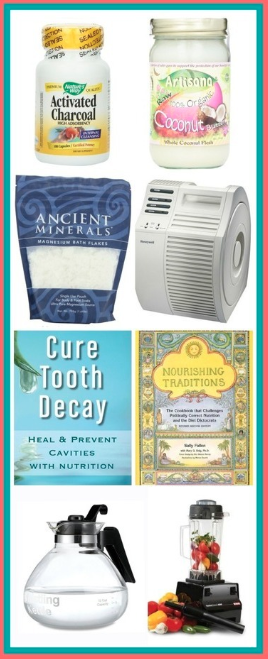
If you noticed I also have some new ads on the side of my blog. I choose to put these there because I though it would benefit you to know what kinds of items I love. Check out my amazon store because those are items I always have around. Some of the items you may not know what they are but eventually I will get to using them.

I want to also start to do some reviews tied in with a recipe. I will give you an example. If I made GAPS almond joys and I used unsweetened bakers chocolate, I might talk a little about the chocolate, how the unsweetened kind is better for you and how to use it. Does this sound okay?

I also have exciting news…I am starting giveaways! I have a few in mind already so please keep reading so you get a chance to enter. I have not been able to cook much in this heat I am having in Minnesota. It has been 100 degrees! I don’t like to turn on the oven or stove when the house is already hot. Honestly I have not been in the mood to cook at all but it gave me time to work on my blog. Soon enough I will get a recipe up-maybe coconut milk ice cream.

One last thing, I really want expand my blog views and readers so please spread the word!


~Stay gutsy, Caroline


disclosure 3